
The best part about the One Step Paint is that there is no prep work needed! It has a beautiful chalky finish without any use of the other products but here I am demonstrating how to antique the One Step Paint with the Light Wax, Dark Wax, and Dust of the Ages.
Materials Needed:
Amy Howard At Home One Step Paint (38 colors available)
Stir Stick (to mix the paint before applying)
China Bristle Brushes (3-4)
Piece of Furniture or the project you will be working on
Amy Howard At Home Light Wax (has an amber tone)
Amy Howard At Home Clear Wax (if you prefer in clear finish instead of amber)
Cardboard palette (for your waxes)
T-shirt rags
Amy Howard At Home Dark Wax
Amy Howard At Home Dust of the Ages
How To Instructions:
1. Wipe down object’s surface to clear any dust, dirt, etc.
2. Thoroughly shake the One Step can for 1-2 minutes.
3. Open lid of One Step with can opener and then thoroughly STIR with stir stick. **This shaking will bring the pigment from the bottom of the can**
4. Use China Bristle brush to coat your object with ONE coat of One Step Paint. Do not allow the paint to become too thick in areas because the paint is at such an opaque quality.
5. Once object is covered in ONE coat, allow the object to dry for 30-45 minutes. Some thicker areas may take closer to 45 minutes.
6. Apply SECOND coat of One Step Paint.
7. Allow to dry for 30-45 minutes. You want this second coat to be completely dry if you are applying wax after . . . **If you desire your piece to have that dead, chalky finish, you may leave the second coat as is! There is NO sealing required for One Step Paint.
Now, if you are desiring your piece to have that authentic antique look, it’s time to add Amy Howard at Home waxes and Dust of the Ages.
8. Dip a new China bristle brush in the Light Wax. Get enough to cover the tips of your bristles.
9. Use the cardboard palette to off load some wax from your brush. You do not want your bristles to be overwhelmed with wax.
10. Swipe bristles with Light Wax in different directions with no particular pattern across your piece. Make sure to cover every inch in this wax.
11. Allow to dry for 45-60 minutes.
12. Now, use a China bristle brush to lightly dip into the Amy Howard at Home Dark Wax. Again, you do not want to overwhelm your brush with wax.
13. Use your cardboard to off-load your brush with excess wax. You do not want your Dark Wax to be too heavy.
14. Now, like with the Light Wax, use your brush to lightly brush over your piece on places WHERE THE PIECE WOULD GET NATURALLY DIRTY, like the edges of a piece of trim, the crevices of a cabinet door. You do not want to cover every inch of your piece with the Dark Wax.
15. Allow your Dark Wax to dry enough but still remain tacky. This will allow the Dust of Ages to stick and settle to the piece.
16. Now, use your Amy Howard at Home Dust of Ages to cover your piece, especially in the crevices and ridges. This will give your piece age and character.
17.Use a dry china bristle brush to pounce/push your Dust into the corners, ridges and crevices. Really use your bristles to get that Dust down in there!
18.Brush the excess Dust off onto your palette and back in your container. It can be reused and saved for later.
19.Now, use your T-shirt rag to buff your piece to get that patina shine.This buffing will allow your piece to have that authentic aged look.
20.Now, step back and enjoy your piece!
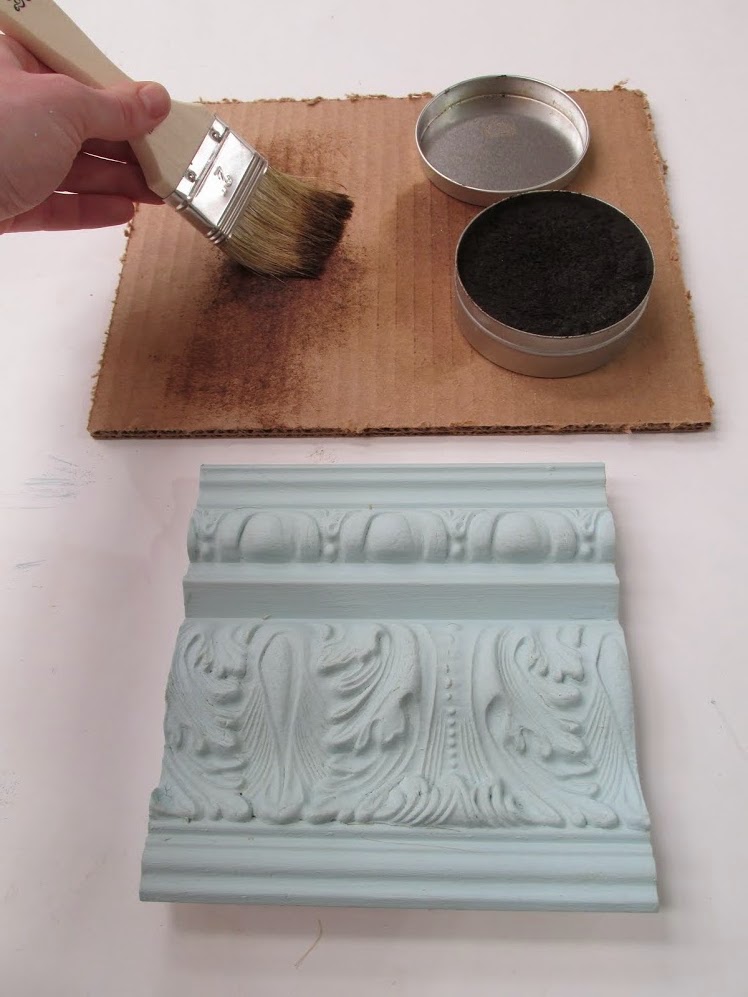
How To Process Photos:

Apply One Step Paint to any surface

Be sure to paint with ending strokes long and with the grain.

Let it dry!

Apply even 100% coverage of Light Wax

Never go directly from can of Light Wax to the piece.

Always off-load onto a cardboard palette.


Light Wax has a slightly amber tone.
If you apply too much of wax, this tone will show through.
To avoid any additional tone at all, complete same process with
the Amy Howard At Home Clear Wax instead of the Light Wax

You can see a slight tonal change after adding the Light Wax


After Light Wax has dried for at least 15 minutes, apply your Dark Wax to
add age and a worn look to the piece of furniture


Remember to always off load before waxing piece.
The Dark Wax does not require a lot of wax to add color.

Apply Dark Wax in a feathering motion. Lightly grazing the surface.

Dark Wax should not be applied consistently.
It is important to add in places where age and wearing would have occurred.


After Dark Wax has dried for at least 15 minutes, apply Dust of Ages to your piece.


Don't be shy, you can always save excess


Pounce the Dust of Ages in the crevices

Save you excess to reuse!

Use your t-shirt rag to buff


Once you have buffed to your desired shiny and dusty balance, your piece is finished!


Create a luxury lifestyle, the DIY Way!
No comments:
Post a Comment